9. Modifying and Creating Themes
New in version 2.2.0.
Contents
Metacat’s theming system, MetacatUI, is deployed separately from Metacat, allowing more independent user interface customization. Check the MetacatUI GitHub for the most up to date version.
MetacatUI is structured in a model-view-controller architecture using Backbone.js. Some background knowledge on Backbone.js may be helpful for advanced modification of MetacatUI, but is not necessary for editing the CSS styling and HTML of the included MetacatUI views.
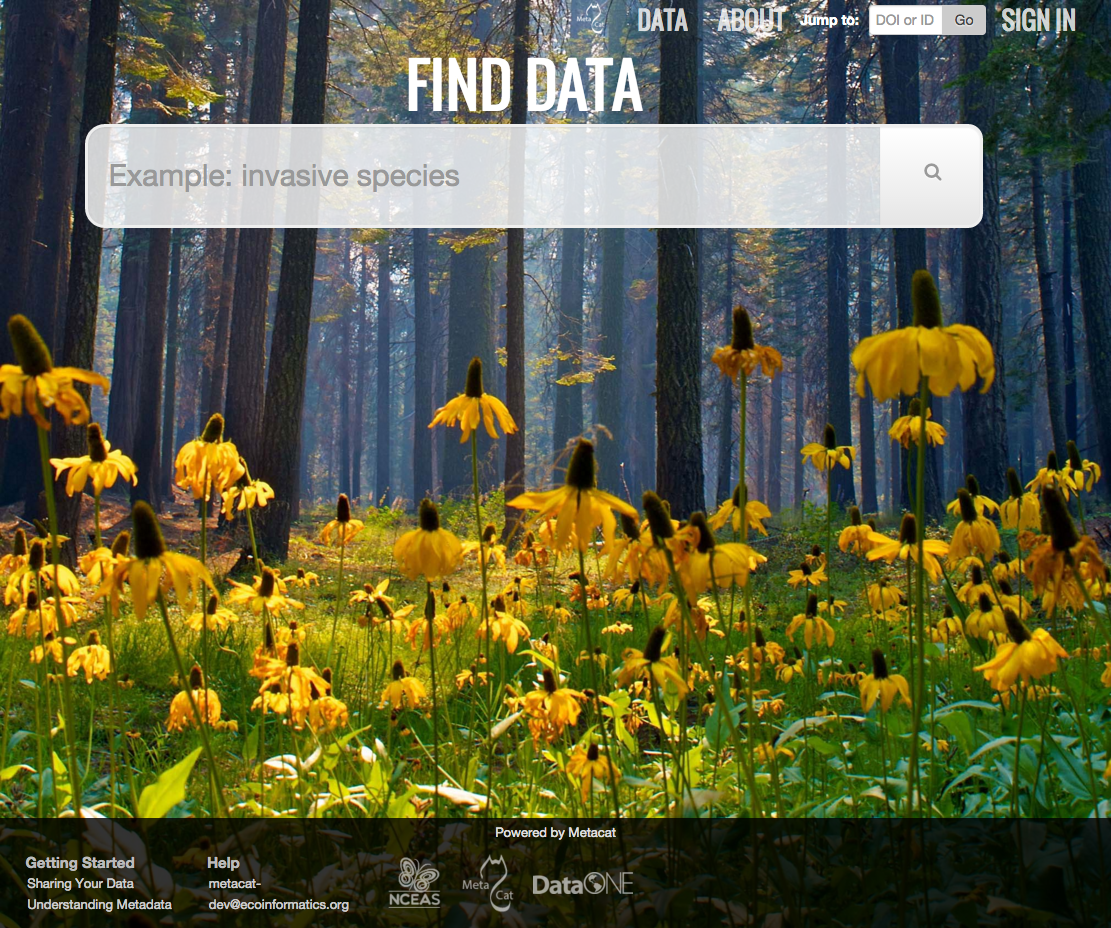
MetacatUI’s default home page. Users can customize the appearance using themes.
9.1. Quick Start Using the Default Theme
The default theme can be used out-of-box. To make simple edits such as change the logo in the header or footer, add links to the navigation, etc., we will need to create a new theme, make our changes to the header and footer HTML templates, but borrow all other templates from the default theme so we don’t have to create everything from scratch.
Create a new theme: Duplicate the
js/themes/defaultdirectory and rename it to a unique theme name with no spaces.Add your logo: In the
js/themes/<yourtheme>/imgdirectory, add the following image files:- Your organization’s logo
- Any supporter or donor logos to use in the footer
3. Customize the header and footer: Create a templates directory in js/themes/<yourtheme> and copy the following files from js/templates into
that new directory:
- footer.html
- navbar.html
3a. Open the js/themes/<yourtheme>/templates/footer.html file and change the footer logo image paths and the link paths to direct to
your new footer images and their corresponding web addresses. For example,
<a href="http://nceas.ucsb.edu" target="_blank">
      <img alt="NCEAS" src="./js/themes/yourtheme/img/nceas-logo-white.png">
</a>
You can add or modify any of the HTML in the footer; we are using the logo only as a simple demonstration.
3b. Similarly, open the js/themes/<yourtheme>/templates/navbar.html file and replace the Metacat logo file with your organization’s logo file. You can also add more links to this header navigation.
4. Create your theme map: By default, Metacat will use the default theme templates unless you specifically tell Metacat to override these with the template files in your custom theme.
In the js/themes/<yourtheme>/config.js file, change the theme name on line 1, default, to your chosen new theme name.
In the themeMap, add a new line for every template you have edited and added to your new theme. An example for the footer.html and navbar.html files is below.
var theme = theme || "default";
var themeMap =
{
        '*': {
                // example overrides are provided here
                'templates/navbar.html' : 'themes/' + theme + '/templates/navbar.html',
                'templates/footer.html' : 'themes/' + theme + '/templates/footer.html'
                }
};
- Repeat step 3-4 as necessary for any other template files you edit.
- Open
index.html. Edit the following line to reflect your theme name (data-theme) and your Metacat context (data-metacat-context). (The Metacat context is the name of the directory in which Metacat is installed in the Tomcat web-application directory (most likely “metacat”). Whomever installed Metacat will know what this directory is called. If your MetacatUI is already successfully retrieving datasets during searches, this is already set and can be left as is.)
Specify your theme and metacat context Open
index.html. Edit the following line to specify your theme name (attributedata-theme) and your Metacat context (attributedata-metacat-context) (The Metacat context is the name of the directory in which Metacat is installed in the Tomcat web-application directory (most likely “metacat”). Whomever installed Metacat will know what this directory is called. If your MetacatUI is already successfully retrieving datasets during searches, this is already set and can be left as is.)<script data-theme="default" data-metacat-context="metacat" id="loader" type="text/javascript" src="loader.js"></script>
9.2. Creating a Custom Theme
All themes share the same CSS, HTML, JavaScript and image files. Any of these files can be customized by creating a new theme and telling Metacat to override the default files with the ones in your custom theme.
1. Create a new theme: Copy an existing theme directory structure, found in js/themes, and rename that directory after your new theme.
Notice that each theme directory looks something like this:
css/
img/
routers/
templates/
config.js
- Style your theme Add a CSS file to your theme by creating a CSS file in the
js/themes/<yourtheme>/css/directory namedmetacatui.css - Add images Add your custom images to the
js/themes/<yourtheme>/imgdirectory. - Edit templates Add HTML templates to the
js/themes/<yourtheme>/templatesdirectory. - Create your theme map Open the
js/themes/<yourtheme>/config.jsfile. In here you will define your theme and themeMap. By default, Metacat will use the default theme templates unless you specifically tell Metacat to override these with the template files in your custom theme.
var theme = theme || "default";
var themeMap =
{
        '*': {
                // example overrides are provided here
                //'views/AboutView' : 'themes/' + theme + '/views/AboutView.js',
                //'templates/navbar.html' : 'themes/' + theme + '/templates/navbar.html'
                }
};
Change the theme name on line 1, default, to your chosen new theme name. Then follow the commented out examples in themeMap to
explicitly tell Metacat which default shared files should be overridden with your custom theme
files. The pattern is:
path/originalFile.html : 'themes/' + theme + '/path/newFile.html'
Note: You do not have to override the CSS or image files.
7. Specify your theme and metacat context Open index.html. Edit the following line to specify your theme name (attribute data-theme) and your Metacat
context (attribute data-metacat-context):
<script data-theme="default" data-metacat-context="metacat" id="loader" type="text/javascript" src="loader.js"></script>
9.2.1. Changing the background images on the default theme
The js/templates/app.html file contains the <img> element for the background image:
<img src="" class="bg" id="bg_image" data-image-count="9" />
Change the data-image-count attribute to the number of images you would like to cycle through in your custom
theme. To have the same background image on all views, change this value to 1. To not use the background image at all, simply remove this <img> element.
Store your custom background image files in js/themes/<yourtheme>/img/backgrounds. Keep the naming convention of bg1.jpg, bg2.jpg, etc., making sure
that all numbers from 1 to your specified total (data-image-count) are included. (i.e. do not skip any numbers, such as bg1.jpg, bg3.jpg …)
9.2.2. Advanced options for custom themes
Advanced users can choose to override the JavaScript files for even more customization of MetacatUI.
The router.js file can be modified to render different views based on the URL. For example,
a theme which has no home page and routes users to the DataCatalogView view instead, would modify router.js
like so:
// MetacatUI Router
// ----------------
var UIRouter = Backbone.Router.extend({
        routes: {
                ''                                              : 'routeToData',    // route ROOT to data
                'about'                     : 'renderAbout',
                'about(/:anchorId)'         : 'renderAbout',
                'plans'                     : 'renderPlans',
                'tools(/:anchorId)'         : 'renderTools',
                'data(/search/:searchTerm)(/page/:page)' : 'renderData',
                'view/*pid'                 : 'renderMetadata',
                'external(/*url)'           : 'renderExternal',
                'logout'                    : 'logout',
                'signup'                                : 'renderLdap',
                'account(/:stage)'          : 'renderLdap',
                'share'                     : 'renderRegistry'
        },
In this example, the index path, '', was changed from
the value renderIndex which renders the IndexView.js view, to routeToData which reroutes to data,
in turn rendering the DataCatalogView view.
routeToData: function () {
        console.log('Called UIRouter.routeToData()');
        this.navigate("data", {trigger: true});
},
Note: Remember to include any views or routers in your list of overrides in js/themes/<yourtheme>/config.js for each file you modify
For more information about Backbone.js, see the Backbone.js documentation at www.backbonejs.org
9.3. Using Custom Endpoints
MetacatUI can also be configured to use custom DataONE endpoints for both Member Node and Coordinating Node APIs.
The dataone theme shows an example of this endpoint customization in the AppModel.js file.
In custom themes, the AppModel.js values can be edited to suit your particular deployment needs.
For querying the DataONE Coordinating Node, for example, the following properties would be set:
context: '',
d1Service: "/cn/v2",
d1CNBaseUrl:  "https://cn.dataone.org",
d1CNService: "/cn/v2",
But querying a Metacat Member Node would be configured as:
context: '/metacat',
d1Service: '/d1/mn/v2',
d1CNBaseUrl: "https://cn.dataone.org/",
d1CNService: "cn/v2",
9.4. Creating a Custom Skin
Deprecated since version 2.2.0: Use MetacatUI themes for any new UI development. Metacat’s original skinning mechanism is still included and used for aspects of rendering metadata, but is not the preferred method for building web clients for Metacat.
To MetacatUI themes, select metacatui as the default skin during skin configuration
in the administration interface.
Skins are used in Metacat to customize the appearance of the search and display web interface that is presented by Metacat. Skins can be used to make a Metacat instance exactly integrate into an existing web site, and are fully customizable.
To create and customize your own Metacat skin, you must first create a skin directory. This is most easily accomplished by copying one of the existing skin directories. Step-by-step directions for creating and installing a custom skin are included below:
- Copy an existing skin directory. We recommend using the “default” directory.
sudo cp -r <CONTEXT_DIR>/style/skins/default/ <CONTEXT_DIR>/style/skins/[yourSkin]/Where
<CONTEXT_DIR>is the directory in which the Metacat application code lives and[yourSkin]is the name you wish to apply to your skin.
- In
[yourSkin]directory, change all files nameddefault.xxxtoyourSkin.xxx. The following files should be changed:
default.css
default.js
default.properties
default.properties.metadata.xml
default.xml
- In the metacat.properties file(
<CONTEXT_DIR>/WEB_INF/metacat.properties), add[yourSkin]to the value of the skin.names property. - Restart Tomcat. Log in as the user that runs your Tomcat server (often “tomcat”) and type:
/etc/init.d/tomcat7 restart
Navigate to Metacat’s Configuration utility and select the Configure Skins option. Your custom skin should appear as a choice in the skins list. Change the layout and style by modifying the header, footer, css, and other files in your new skin directory.
It is important to note that all customized skins will be overwritten when Metacat is reinstalled or upgraded. Please remember to back up your skins before reinstalling or upgrading Metacat.